Attribute Training in TK Punk Gold
Grow stats without starving prosthetics, bonds, or commissions.
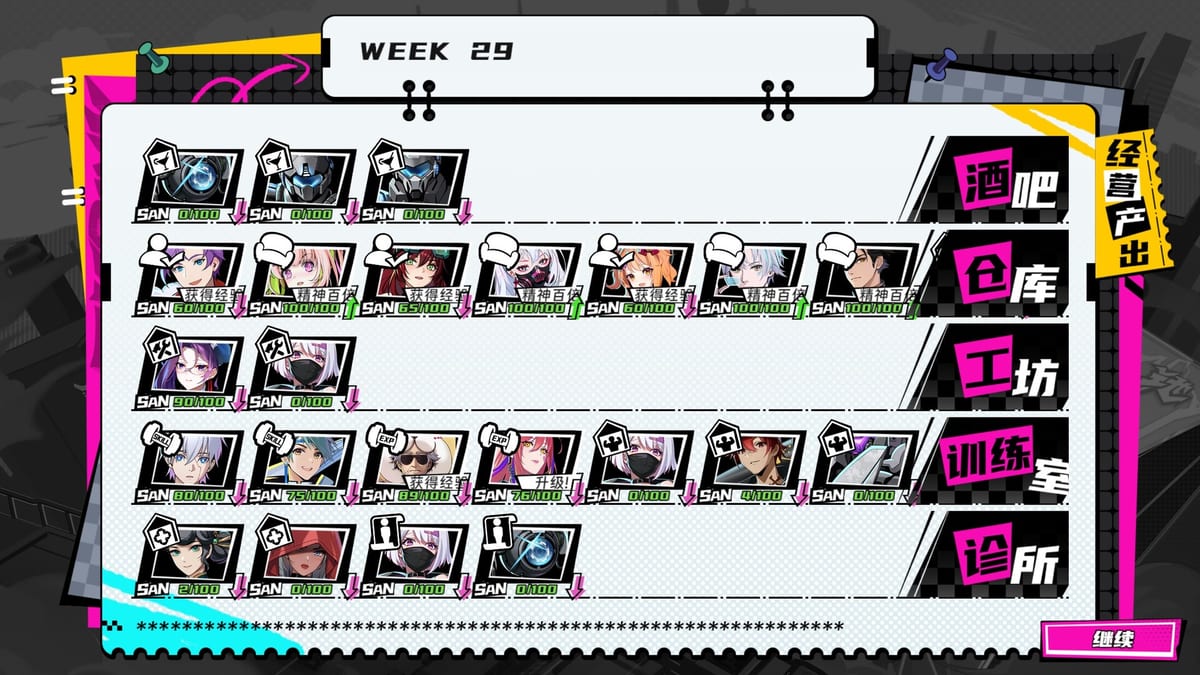
Every week in TK Punk Gold asks the same question: where do your action points go? Attribute training—stat growth through practice, work dispatch, and related raising-sim menus—is one of the quiet power curves that separates smooth commission clears from Cyber Frenzy spirals. It competes directly with prosthetic research, Gold Bar labor, companion bonds, and faction-critical story beats across fifty weeks. This guide explains how training fits the mobility budget, when dispatch beats menu grinding, and how to avoid the classic trap of “strong stats, empty prosthetic tree.”
Read How to Play TK Punk Gold for decision order and Time Management for phase budgets. Combat outcomes tie to Combat Guide and Prosthetics Builds.
What attribute training actually buys
Steam’s pitch lists attribute training alongside equipment research, work dispatch, partner development, and commission execution as equal bids on limited mobility. Training raises baseline combat stats and job readiness so companions can survive turn order mistakes without instantly tripping Cyber Frenzy. It does not replace prosthetic identity—modules and research lanes still define breakpoints, synergies, and role coverage per the Synergy Guide.
Think of training as floor and prosthetics as ceiling. A high floor with no ceiling clears early Hanport jobs; mid-campaign D.H.C commissions expect both.
Work dispatch vs focused training menus
Work dispatch sends companions (or the protagonist) into bar-adjacent or city jobs that may blend income, stat ticks, and narrative flavour. It is attractive when the Gold Bar needs cash and you still want passive growth. The risk is dispatching everyone into low-yield shifts while a story commission deadline looms.
Focused training spends mobility on explicit stat nodes or practice blocks. It is faster for combat gates but steals weeks from bonds. Use dispatch when Bar Management says cash is yellow; use focused training when How to Beat Commissions says your next gate is two weeks away.
AP allocation framework
Use this weekly question stack:
- Mandatory spend — story commission, forced bar event, recruit trigger from How to Recruit.
- Survive — Gold Bar solvency next week.
- Gate — training or research node that unlocks the next fight.
- People — one bond scene if primary route needs it (Bond Tracker).
- Politics — faction-aligned dialogue if Faction Routes week.
Training never outranks mandatory story pressure forever, but it can outrank optional hangouts for several weeks when combat gates stack.
Training vs prosthetic research
Research is slow, expensive, and easy to fragment. Training is incremental and tempting because numbers move every session. The failure mode is maxing visible stats while prosthetic lanes sit at 80% completion—80% nodes often grant zero combat value.
Rule of thumb for most runs:
- Finish one prosthetic package for your anchor or breaker before spreading training across the full roster.
- Train companions who will field next week’s commission; bench warmers can wait.
- Sync training targets with Companion Tier List role language—do not train a support like a burst carry.
Training vs bonds and companion endings
Thirteen companions mean thirteen possible time sinks. Training everyone equally is how players arrive at week forty with shallow affection and mediocre stats. Pick a primary bond and a combat core of three to four fighters; train the core every power week, bond the primary on dedicated bond weeks from Time Management.
Companion Endings need scenes, not just stats. Protagonist growth matters for story framing but does not auto-unlock partner finales.
Protagonist and humanoid AI growth
You play a humanoid AI operative in Zhang Jiao’s GOLD cell. Protagonist-facing training or dispatch may appear in menus separate from companion lists. Prioritise protagonist stats when commissions assume you participate; deprioritise when you act as commander-only for a week. Lore context lives on Protagonist.
Mid-game and late-game training curves
Weeks 13–28: training should support a stable party identity—one tank line, one break line, one burst line.
Weeks 29–40: reduce experimentation; train only to hit known commission checks or finish prosthetic prerequisites.
Weeks 41–50: training is mostly maintenance unless a finale fight explicitly demands it. Do not open new stat fantasies while Ending Checklist items remain open.
Common mistakes
- Training benched romance partners because they are favourite in gallery scenes.
- Ignoring dispatch when the bar is broke, then over-training while cash-negative.
- Splitting research across four trees while training six characters.
- Assuming stats fix bad synergy—see Combat Guide.
Tools and cross-links
Week Planner for power weeks vs bond weeks. Builds Hub for prosthetic completion targets. Getting Started for first-week order. Updates Hub if patches mention AP economy changes.
Attribute training is not glamour content—it is the boring spreadsheet that keeps Hanport commissions readable. Spend AP on it deliberately and the fifty-week clock stops feeling like a stat check lottery.
Frequently Asked Questions
Quick answers for Hanport City survivors.
Should I prioritize training or prosthetic research?
Finish one meaningful prosthetic package for your active party, then train the fighters who will take next week’s commission. Stats alone rarely fix missing modules.
What is work dispatch for?
Dispatch blends bar-adjacent work, possible stat growth, and cash flow. Use it when Bar Management warns about solvency; switch to focused training before hard fights.
Can I max every companion’s stats in one run?
Unlikely alongside thirteen bonds, faction polish, and research. Train a combat core and maintain the rest opportunistically.
Does training affect endings?
Indirectly—weak stats cause retries that steal weeks needed for Heaven, Earth, Man, and companion thresholds.
Where does the protagonist fit?
Train the humanoid AI when you field them in commissions; see Protagonist page for story framing.